Maintaining your home can be a challenge, especially when it comes to plumbing. Plumbing issues can be frustrating, messy, and can even cause damage to your home if left untreated. However, you don’t always have to call a professional plumber to fix the problem. There are some plumbing jobs that you can easily do yourself without spending a fortune. In this article, we will discuss some of these plumbing jobs and how you can fix them without calling a plumber.
1. Leaky Toilet Flapper
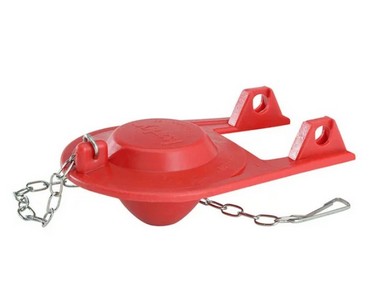
A leaky toilet flapper is one of the most common plumbing problems that homeowners face. It’s an easy fix that can save you money on your water bill. The flapper is a rubber piece that sits at the bottom of the tank and is responsible for allowing water to flow into the bowl when you flush. If the flapper is worn or damaged, water can leak from the tank into the bowl, wasting water and money. To fix this problem, all you need to do is replace the flapper. You can get a cheaper one from Walmart or any home improvement store. Follow the instructions on the package and you’ll have a leak-free toilet in no time.
2. Broken Toilet Shut-off Valve Handle
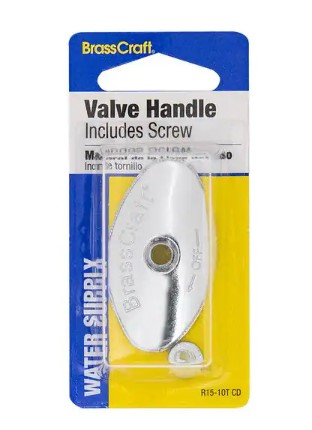
If you have a toilet with a cheaply made plastic shut-off valve handle, it may break after several years of use, which can be quite inconvenient. However, there is no need to worry because replacing the handle is a quick and easy fix that will save you the time and money of having to replace the entire valve. Just unscrew the handle and take it to Home Depot or any hardware store to find a replacement. It’s important to choose a durable material that can withstand the test of time. Metal handles are a great choice because they are more durable than plastic ones, and will last much longer.
3. Leaky Toilet Shut-off Valve
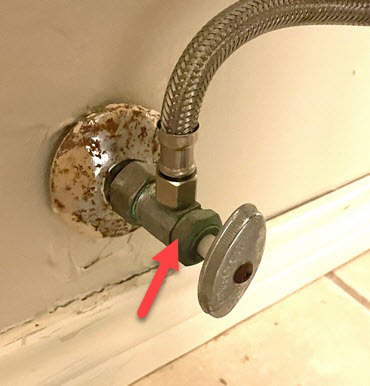
If your toilet shut-off valve is leaking, you can easily fix it yourself without calling a plumber. All you need to do is tighten the packing nut on the toilet shutoff valve one-eighth to one-fourth turn clockwise. The packing nut is located behind the handle and can be identified by a red arrow in the following photo. Use a wrench to tighten the nut and test the valve to see if it still leaks.
4. Broken Outdoor Faucet Handle
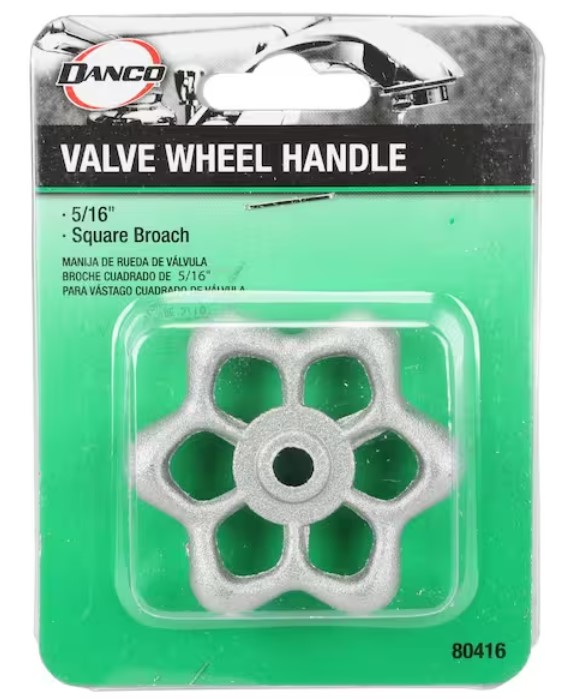
After years of exposure to the sun, the handle on your outdoor faucet may become damaged or broken. If you are unable to turn it, use pliers to tightly shut it off. Then, unscrew the handle and take it to Home Depot or any hardware store to find a replacement. Try to find an exact same handle, or at least something similar. Many handles come with adapters to fit different faucets. Put the new handle back and tighten it with a screwdriver. Remember, there is no need to shut off the water for the entire house.
5. Leaky Outdoor Faucet
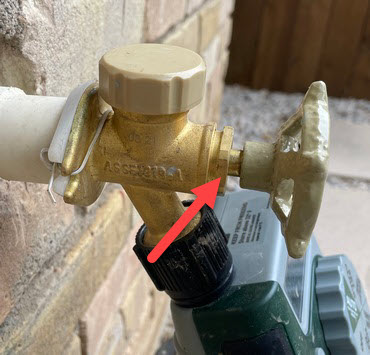
Similar to a leaky toilet shut-off valve, there is a packing nut located behind the handle of your outdoor faucet, indicated by the red arrow in the following photo. Tightening the packing nut one-eighth to one-fourth turn clockwise should stop the leak. Use a wrench to tighten the nut and test the faucet to see if it still leaks. Remember not to over-tighten the nut.
6. Leaky Sink Faucet
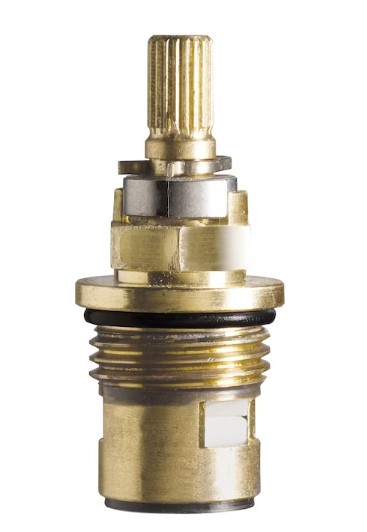
A leaky sink faucet can be a nuisance and can cost you a lot of money if you hire a plumber to fix it. However, if the problem is only a slow leak, you can replace the internal valve yourself. A valve is the one that looks like the following photo. This job will take some time, so make sure you watch a guide on YouTube to learn how to do it properly. A good sink faucet can cost $200 to $500, and having a plumber install it for you can cost an additional $100 to $200. By fixing it yourself, you can save a few hundred dollars because a valve will only cost $20 to $50 at Amazon.
7. Stuck Food Disposer
If your kitchen sink’s food disposer is not working at all, the first thing worth checking is to see if the reset button has been tripped. The reset button is situated on the bottom of the disposer unit, and it may trip when the motor becomes overheated or overloaded. You can simply press the reset button and then try the disposer again to see if the problem is resolved. This action should restore the disposer’s functionality, assuming that the cause of the problem was indeed an overloaded or overheated motor.
If the disposer is still stuck, you can try manually turning the blades to free up any blockages. First, unplug the power, and clean up the inside of the unit as much as possible. Then, locate the hexagonal-shaped hole in the center of the bottom of the disposer. You can turn it with an Allen (hex) wrench. Turn the wrench clockwise and counter-clockwise several times to try and release any blockages.
